Thursday, March 19, 2009

Irish Meets American- My St. Paddy's Day Meal

Happy belated St. Patrick's Day to all of you. I hope it was a good one filled with corned beef, green beer or whatever floats your boat.

I don't usually do anything especially Irish on St. Patrick's Day. It's pathetic I know. Maybe because I only have a wee amount of Irish in me (hear my strong Irish Brogue?). In reality the the holiday is to honor St. Patrick, think about the start of spring and get a much welcome reprieve from Lenten resolutions. Now it is just an excuse to party! I remember one year, in my younger, single days, in which my friend and I got to an Irish pub a little before 5pm. After over an hour and a half of standing in line with no real signs of promise that we would EVER get in, we hightailed it out of there and had a glass of wine at some "non-Irish" and probably classier bar. That line thing was NOT up our alley. Nor is getting there and beginning to drink in the "wee" hours of the morning. Some people have to work! I'll go to an Irish pub another day of the year.

This year, however, I was in the mood to make the infamous corned beef! But my husband didn't think he would like it or eat it. Soooo picky! ;( So I came up with the idea of corned beef and pastrami sandwiches with cold slaw! At the last minute we invited a couple neighbors over too. I made green malts for the kids. The guys had beer and the women, wine. So you see... it wasn't quite corned beef and cabbage nor was it exactly hamburgers and fries. But very Irish-American wouldn't you say?

I didn't get a great picture of the cold slaw but I made it with my grandmother's ultra simple recipe with a little modification. She used just the cabbage, mayonnaise, a splash of white wine vinegar and a teeny teeny bit of sugar plus salt and pepper. We don't measure much in my family. My changes were, adding green onions, green bell pepper sliced very very thin and I used Julia Child's recipe for homemade mayonnaise. This was a GOOD cold slaw! I am picky about cold slaw but this was good!

I purchased the deli meat and amazing Gruyere cheese at this awesome German Deli near here. Mattern Deli has THE best sausage, meats, roast beef, pastrami and more. I love their sandwiches! And the bread... so different from that you find in most any other market. If you are in Orange, go check them out!

I thought the kids, as well as the adults might like a little pot of gold to go with their meal.
May the luck of the Irish be with you this year. We could all use a little pot of gold about now!

For a little more depth on the holiday and it's traditions, check out this video.


Wednesday, March 18, 2009

Double Double Protein Style!

Test
I don't know how many of you are familiar with In 'N Out. They really do have GREAT cheeseburgers!

How many of you know about the "secret" menu? Well in case you don't know, there are a number of ways to order your burger that are not posted on the menu boards at the restaurant. My favorite alternative to the regular cheeseburger is the "Double Double Protein Style"! This burger comes sans (without) a bun and is good for those minding their carbs more than their calories. And let me tell you... it is soooooo good! Almost just as satisfying as the regular double double! Go on... get a burger today!

Sunday, March 15, 2009

Cherry Berry Shortcake and My First Recipe Contest

It all started out with the contest. Do you know the one? Did any of you enter? The contest that Foodbuzz was running for Outstanding in the Field sponsored by Quaker True Delights. Well it called for recipe entries using on or more of the following ingredients:

Cashews • Chocolate • Raspberry • Almond • Bananas • Coconut • Macadamia nuts • Cherries • Cranberries

And the winner gets a trip to Chicago and an amazing outdoor dinner. So I thought... why not? Let's give it a shot! But the ingredients lent themselves more to a sweet concoction than that of a savory one. I can create and make up sauces, dips, appetizers and the like but a dessert? That is not as easy. What would be the point anyway? I never win anything. But the challenge was gnawing at me. I started to brainstorm. Cheesecake kept popping into my head. But could I pull it off? I kept toying with ideas. There were a few. Then it was coming down to the wire. The due date was Feb. 28th. Cheesecake has to be made a day ahead and I hadn't even gotten ingredients or decided the dish completely. Oh hurry up! Just choose, shop and get on with it!

And so I did! What I came up with is a Cherry Berry Shortcake as I call it. From their list, I used raspberries, sour cherries and macadamia nuts. I felt the shortcake idea was something loved by all and not as pretentious as cheesecake can be at times. It is homey and comfortable.

The base or cake I created was inspired by combing parts of my scone recipe with a traditional Scottish shortbread recipe and then I threw in some cream cheese in honor of my jam crescent cookies. I am calling this biscuit a Macadamia Shortbread Scone!

The cream topping was inspired by both clotted cream, whipped cream and cheesecake and has elements of all three in the ingredients and flavor.

As for the berry sauce, I used my grandmother's raspberry sauce for cheesecake as the jumping off point, added the cherries and made a few tweaks here and there.

It wasn't that easy. The hardest part was remembering to write the measurements and ingredients down as I went. Because at times I started small and added. So my paper had many scribbles and crossed out numbers etc.. The end result? Well it was pleasing to the eye and the taste? Soooo fabulously good! It was just amazing! The shortbread scones are right up my alley. My sister, cousins, mom and even my picky husband just couldn't get enough.

Here is my recipe. It is kind of long due to the 3 parts. But it is not really that time consuming.

CHERRY BERRY SHORTCAKE

Macadamia Nut Shortbread Scones


Ingredients
2 cups flour
1/2 cup powdered sugar (plus a tiny bit more if you wish for sweeter scones)
1/4 tsp. salt
1/4 tsp. baking soda
1 tsp. baking powder
About 1 cup chopped madadamia nuts
10 Tbls. butter (cold)
4 oz. cream cheese (cold)
1/2 cup sour cream (heavy cream that has soured or regular cream or milk will work)

In large bowl combine the flour, sugar, salt, baking soda and baking powder until mixed. Add the macadamia nuts.

Cut the butter and cream cheese into the dry ingredients until it resemble course meal. Add the cream (or milk) and stir until the ingredients hold together and form a dough. Using your hands shape the dough into a 2-3 inch thick log. Wrap in plastic and refrigerate for at least one hour.

Preheat oven to 350°. Spray a cookie sheet with non-stick spray. Pull the cold log of dough out of the refrigerator and roll into plain granulated sugar or cinnamon sugar mixture. Cut into 1 1/2 inch discs and place onto baking sheet. Bake for about 20 minutes or until lightly colored. Cool.

Sour Cherry, Raspberry Sauce

Ingredients
Zest of 1 lemon
Juice of 1 lemon
1/4 cup pomegranate jelly
1/4 cup raspberry preserves
1 Tbls. cornstarch
1-3 Tbls. sugar
1/2 cup frozen raspberries
3/4 cup frozen sour cherries

Mix the cornstarch, lemon juice and pomegranate jelly in small bowl until combined. Pour into sauce pan along with the raspberry preserves and heat on medium low until no longer cloudy and sauce begins to thicken. Add the frozen fruit and heat until warm and beginning to bubble. The frozen raspberries will begin to break apart. Add sugar to taste. Remove from heat and cool. Can be made a day ahead.

Whipped Lemon Cream

Ingredients
4 oz. cream cheese (softened)
1/3 cup creme fraiche
1/3 cup sour cream (commercial)
3 Tbls. granulated sugar
2-3 Tbls. lemon juice
3/4 cup heavy cream
1 tsp. vanilla
1/4-1/3 cup powdered sugar (to taste)

Combine cream cheese, creme fraiche, sour cream, lemon and granulated sugar until smooth and creamy.

Meanwhile put heavy cream in a large bowl and beat until beginning to thicken. Add vanilla and powdered sugar (to taste). Continue to whip the cream until soft peaks form.

Fold the cream cheese mixture into the whipped cream until just mixed.

Assemble the Dish

Place the macadamia shortbread scone on a plate. Pour a little berry sauce over it. Top with whipped lemon cream and a little more sauce.

Garnish with fresh berries, macadamia nuts or an extra scone piece. Serve immediately.

Now I wonder who won? Have you heard? I cannot find a post or announcement on the Foodbuzz site. I thought the results would be in today or sooner? We shall see. I am not holding my breath. But maybe you should until you try my dessert. It is worth the effort!
Saturday, March 14, 2009

Welcome to My Culinary Art Studio

If you are new to my blog, WELCOME! If you are a returning friend, WELCOME BACK! In the past few months or more I have been back and forth and in and out of working on this blog. At times it was just too busy. I had too much to do and too much to take care of. This is the main reason for my absences.

Then a few weeks ago, my one year anniversary in which I began blogging was to arrive. I wanted to do something special. Have a great meal or dish or post or giveaway. The day began to approach rapidly and I had no great ideas. No fabulously perfect dishes to share. I wasn't altogether that busy. I had many posts and photos in the vaults and in my head but I was out of steam. I was just not motivated. I did not feel happy. There are many things to worry about these days with the recession, loss of jobs, money problems, mortgage issues... Many of us are having a hard time. The weight of all these things was upon me and I just could not write, could not concentrate. But as will all things we pick ourselves up, dust off and begin again refreshed.

My goals are many. My hopes are high. My dreams are vast. With this blog, I truly want to make improvements. I want to work harder at providing new recipes. I want to post more often. I want to work harder at my writing skills and food photography. I want to visit other blogs more often. My hope is to provide an enjoyable site with useful tips, recipes, hints and information. One that is fun to read and view as well as something worth continually returning to. I want a more professional outlook yet will still write from my heart and personal feelings. My children will undoubtably pop into the mix from time to time. How can they not? They are the biggest part of my life.

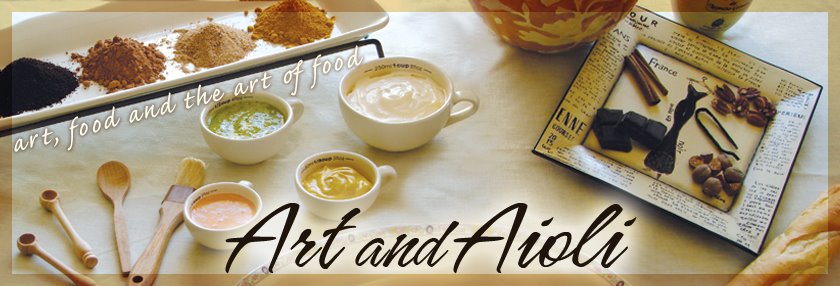
For all of you that are regular visitors, you will note the new masthead. I had an idea for this header nearly a year ago but needed the time to set up the "artist's table". After a couple hundred shots and different configurations from simple to complex, I then went to the computer and played and created in order to come up with the new one above. Within this post you can see my two runner-ups. In the sidebar you can see some of my favorite close up shots from the day. The main idea was to play with the "art" concept along with the "aioli". I wanted it to look like an artist's work table. The work, the art will be the posts. The food. The writing. The creating of recipes and meals and parties. Cooking is an art. To really be good, one should be able to use creativity. Plating of food can be wonderfully gorgeous and have amazing design qualities. So within this site I hope to realize my art as a designer, a chef and a writer.

Thank you to everyone who comes to read and respond to Art and Aioli, a blog about art, food and the art of food. Cheers to you all and here's to new beginnings and hope for more flavorful days to come.

Tuesday, February 17, 2009

Pesto for Peter

Have I ever told you that at one time in my life I did not care much for Italian food? Seriously! I really did not care for it! Oh I liked pizza! That was always good. But pastas... Meehhhh. Marinara bored me and was just not very good. Pesto was horrific. Alfredo was good for about one bite and then felt heavy. They were just there and never fabulous. And really the only thing I thought of as Italian was pasta and pizza. That was in high school. And then I went to Italy the summer after Junior year! Oh boy! Oh boy, oh boy, oh boy! I could not get enough. After eating so much I was nearly comatosed at lunch, I lay there and counted the hours until dinnertime. I adored the pasta. I loved the pasta in France, Austria and Switzerland too!

My tastes must have changed. So I came back to the US ready to embrace Italian food and slurp it up with gusto. But the next time I had spaghetti... Meehhh! Blah, boring, blech, nadda. I was not interested. What was the difference? Why did I like it there?

It didn't take long to figure it out. Here at home I was used to mostly marinara sauce from a jar and dry pasta that was cooked a bit longer than the proper al dente. Or places like the Old Spaghetti Factory. It isn't horrible food there or anything but it is so... American? Or? Just not like the tiny little restaurants I frequented in Italy. In Italy, it was all very fresh, very good ingredients. The sauces were often simple but you could taste the ingredients and they did not overpower the noodles. The pasta was al dente.... just the right amount of bite to it and not the limp kind I was accustomed to. The portions were also smaller. Pasta is not the MAIN course but a small first plate. I don't want a huge portion of pasta normally.

Now I think you can find decent pasta at restaurants sometimes. Americans started catching on to the fact that the pasta should be al dente. Home chefs often began making their own sauces. It is definitely better. But it will never be the same as in Italy... How could it?

So when I make pasta, I always make my own sauces. It is really quite easy and doesn't take much longer than opening up a jar. I do use the dry noodles most of the time. It is easier to just have it on hand. My Italian friends use them. It is just important not to cook them too long. Once in a while I even use a jar of pre-prepared marinara or red sauce. It is palatable. But I can rarely leave it alone. I almost always doctor it up. Unless I am just making it for the kids. But when it comes to pesto sauce, I have tried jar after jar after jar and really I can barely stand to eat a bite. It is never good. I went back to the supposition that I really just don't care for pesto. Until I made my own! What else was I to do with some sad wilted basil?

After I whirred together a few simple fresh ingredients, I stirred it into some homemade pasta from my farmer's market. The pasta was warm and perfectly al dente. I took a bite. My eyes closed. Imagine a chorus of Alleluias swirling my head. This was heavenly! And so easy!

Simple Fresh Pesto

2-3 cups fresh basil leaves
2-6 cloves of garlic (I like a lot so I use 5 or 6 cloves)
2-3 Tbls. pine nuts
1/4-1/2 cup grated fresh Parmesan

Olive Oil (amount is determined by what consistency you prefer)
Salt and pepper to taste

In a food processor, blend the basil, garlic, pine nuts and Parmesan. With the processor going, slowly add the olive oil scraping down the sides occasionally. Keep adding the oil until the pesto is the consistency you desire.

At this point I taste the sauce and decide if it needs more garlic, nuts, basil or cheese. Add and adjust to your taste along with the salt and pepper.

Best if used immediately but it should store in the refridgerator for up to a week. But really it is better right away. I do not heat it directly on the stove. Simply stir it into warm pasta. Or put it on top of some bread or pizza or an egg or a sandwich or... I am sure there are many things it would work well with.

I am dedicating this pesto to my friend Peter (and Kimberly) because I wish this is what I had made for him and Kimberly when I brought food over a few weeks ago. Instead I brought some curry soup that I felt was just not up to par. Not sure what was wrong with it.

So Kimberly, please try this for your husband. It is easy!

Sunday, February 8, 2009

Do You? or Do-U-Not? Do... DOUGHNUTS!!

We all know that they are VERY fattening! They are not good for you, pure and simple. But do you or do you not just crave a doughnut now and then? Do you or do you not eat them from time to time?

Every so often I sure do crave a GOOD doughnut. And a few weeks ago this craving would not go away. I thought about them day and night for two days. I did not go out to buy any. I considered it. I even considered purchasing some at the market. Can you believe that? I don't know that I have ever bought doughnuts from the regular market. Then I started thinking some more.... My mom always loved her grandmother's homemade doughnuts. Why can't I make my own. Especially since I have a deep fryer now!

Yes. The decision was made. I WOULD make doughnuts from scratch. Now for the recipe. I took a look around my cookbooks. Not much to offer in the way of doughnuts. Then our great vast web. There are plenty to be found here. It seems most doughnuts were of the yeast variety. These are good and I shall try it sometime but when it comes to doughnuts, I usually want the cakier type of dense doughnut or old fashioned glazed doughnuts. Not to say that the chewy Crispy Cream yeast doughnuts aren't tasty. They ARE.

Upon perusal I found a few recipes I really wanted to try. But one really stood out. Because I love the old fashioned buttermilk doughnuts and because I happened to have some buttermilk that needed to be used before it went bad, I tried a recipe for Buttermilk Doughnuts that I found on Stephan's site, This Engineer Can Bake. His Recipe is sited as being adapted from Baking Illustrated.

While my doughnuts were not THE most perfect shape in the world, they did come out as very presentable and wonderful tasting. The only problem is that doughnuts are only really really good the day you make them. And one doughnut is really all one should ever eat in a day. So we all ate TWO! Then I gave some to my mom and grandmother. I also froze some as soon as I though it would not melt the plastic bag I put them in. The frozen doughnuts were pretty darn good several days later. I simply heated them in the toaster oven until warm all the way through. This is definitely the way to go if you don't want to eat them all and feel like a heavy ton of bricks.

Note: I do not have a doughnut cutter. But I do have a very sturdy round cookie cutter which I used for the basic shape. For the hole, I used the cap of a water bottle. It worked well enough but the doughnut holes (which I did fry up as well) were not so perfect looking because they sometimes stuck to the cap.

Buttermilk Doughnuts
Adapted from Baking Illustrated

Makes 15 to 17 doughnuts (assuming they all work out)

3 1/2 cups (17 1/2 oz) unbleached all-purpose flour, plus extra for dusting
1 cup (7 oz) sugar
1/2 tsp baking soda
2 tsp baking powder
1 tsp salt
1 1/2 tsp freshly grated nutmeg

3/4 cup buttermilk
4 tbsp (2 oz) unsalted butter, melted
2 large eggs, plus 1 yolk

6 cups peanut/sunflower/safflower oil

Cinnamon Sugar

1 cup sugar (7 oz)
1 1/2 tbsp ground cinnamon

1. Mix 1 cup (5 oz) flour, sugar, baking soda, baking powder, salt, and nutmeg in the bowl of a standing mixer fitted with the paddle attachment.

2. Mix the buttermilk, butter, and eggs including the yolk in a 2-cup measuring cup. Add the wet ingredients to the dry; beat on medium speed until smooth, about 30 seconds. Decrease the speed to low and add the remaining 2 1/2 cups flour, and mix until just combined, about 30 seconds. Stir the batter once or twice with a wooden spood or rubber spatula to ensure all the liquid is incorporated. (The dough will be moist and tacky, like a cross between cake batter and cookie dough.)

3. Fit a candy thermometer to the side of a cast iron kettle or large, heavy-bottomed Dutch oven (or simply use a deep-fryer); gradually heat the oil over medium-high heat to 375 degrees. Meanwhile, turn the dough onto a floured work surface. Roll with a heavily floured rolling pin to 1/2-inch thick. Stamp out the dough rings with a heavily floured doughnut cutter (the width of the ring should be about 3/4 inch or less), re-flouring between cuts. Transfer the dough rounds to a baking sheet or large wire rack. Gather the scraps and gently press them into a disk; repeat the rolling and stamping until all the dough is used. (Cut doughnuts can be covered in plastic wrap and stored at room temperature for up to 2 hours.)

4. Carefully drop the dough rings into the hot far 4 to 5 at a time, depending on the size of your pot. As soon as they rise to the surface, turn the doughnuts with tongs. Fry the doughnuts until golden brown, about 50 seconds per side (mine took about 3 minutes). Drain on a paper towel-lined baking sheet or wire rack. Repeat frying, returning the fat to temperature between batches and adjusting the heat as necessary to keep the oil from overheating.

5. Mix cinnamon and sugar in a bowl or pie plate. After the doughnuts have cooled for about 1 minute toss with cinnamon sugar to coat. Alternately, you can also use non-melting powdered sugar if it is available in your area.

Monday, February 2, 2009

Fries Fries Fries... Hurray for Les Pommes Frites!

Did I ever tell you what I got for Christmas? Well one of the things was a deep fryer. I have always wanted one. I know it isn't healthy but aren't homemade fries better than those from a fast food chain? Or the frozen fries from the market? I think so. After all it is a potato! Along with the fryer, my husband got me a mandolin. In order to really get the french fries right, you need them to be similar in size and shape. The mandolin REALLY helps this out.

If you have been following along for a while, you may remember this post in which I made homemade french fries. Pretty sad when you compare to these beauties! I have made these frites three times now since the holidays and they just keep getting better. A deep fryer and the uniform size is such a great help in making a crisp french fry that is still soft on the inside. With the fryer, they are coming out crisp, golden, hot and full of the potato flavor at the same time. If you are doing french fries at home, this IS the way to go.

Note: Each time I used the mandolin and soaked the cut potatoes in ice water for at least 20 minutes. I then blanched the fries for about 5 minutes in the hot oil and let them cool off for about 10 minutes before refrying for the final result. I salted the hot potatoes after they were finished and while still hot.

One day soon, I plan to blanch a whole bunch of potatos and flash freeze them to use as needed without going through as many steps when we are hungry for these little sticks of yum!

Next time I post on fries, I'll do the sweet potato variety!